Content reporting
IRR Team at ITS, the University of Waikato

DSpace hosting, support, development and consulting

  1. What does it do?

    "As a repository user, I'd like to be able to make DSpace e-mail me CSV files with information to use in content reporting so that I don't have to extract this information manually."

    The content reporting add-on for DSpace XMLUI lets you choose from a configurable list of reports. After choosing some parameters for the report and specifying the date range and recipient's e-mail address, a CSV file is e-mailed sent to the specified address. The CSV file contains metadata for all items that match the report criteria. The idea is that the recipient will then import the CSV file into a spreadsheet program and further manipulate the metadata (e.g. filter or aggregate) to obtain lists of items, counts of items, diagrams etc.

    See also our Open Repositories 2015 poster about the content reporting add-on: http://hdl.handle.net/10289/9352

  2. How does it work?

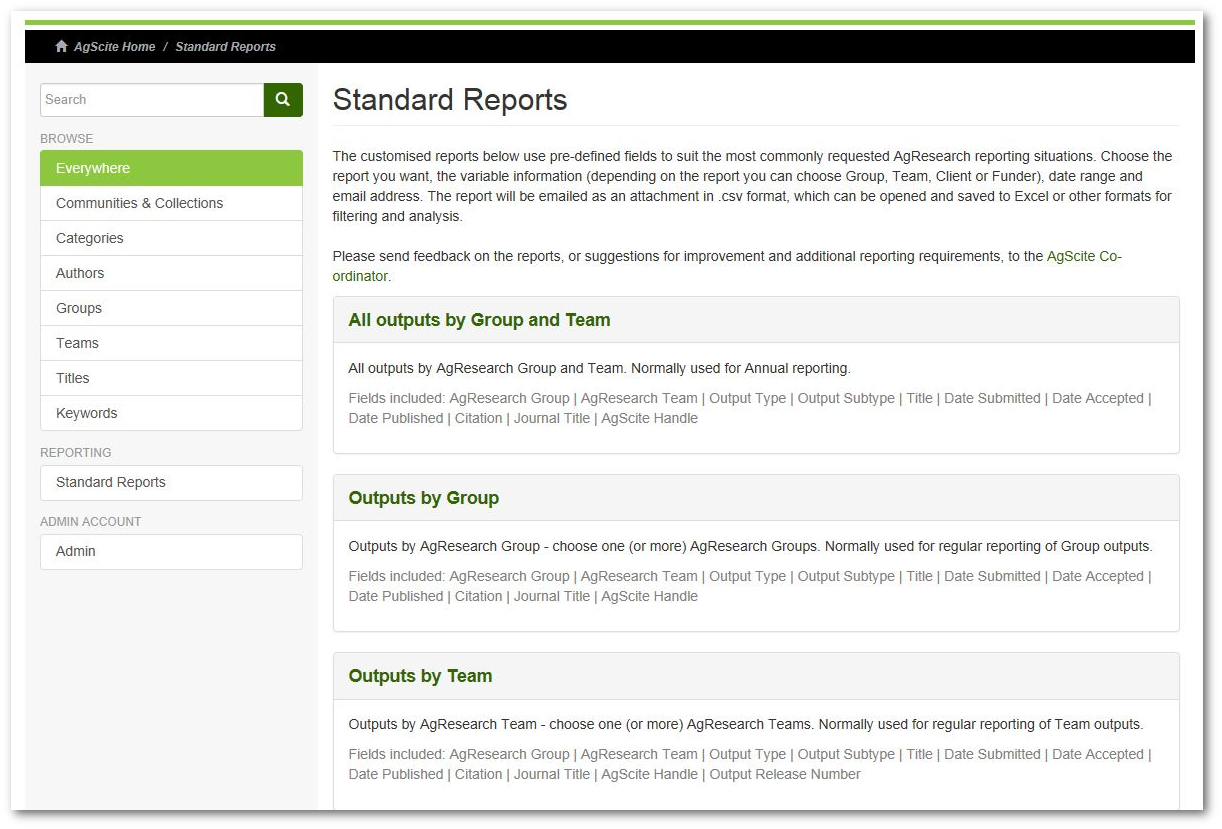
    A reporting section is added to the sidebar.

    The sidebar link takes you to the list of reports. This can be configured via an XML file, see "Configure available reports" below. The reports page gives each report's title and description as well as the list of metadata fields that will be included in the CSV file.

    The report titles are links that take you to the settings page for the selected report.

    The reports screen

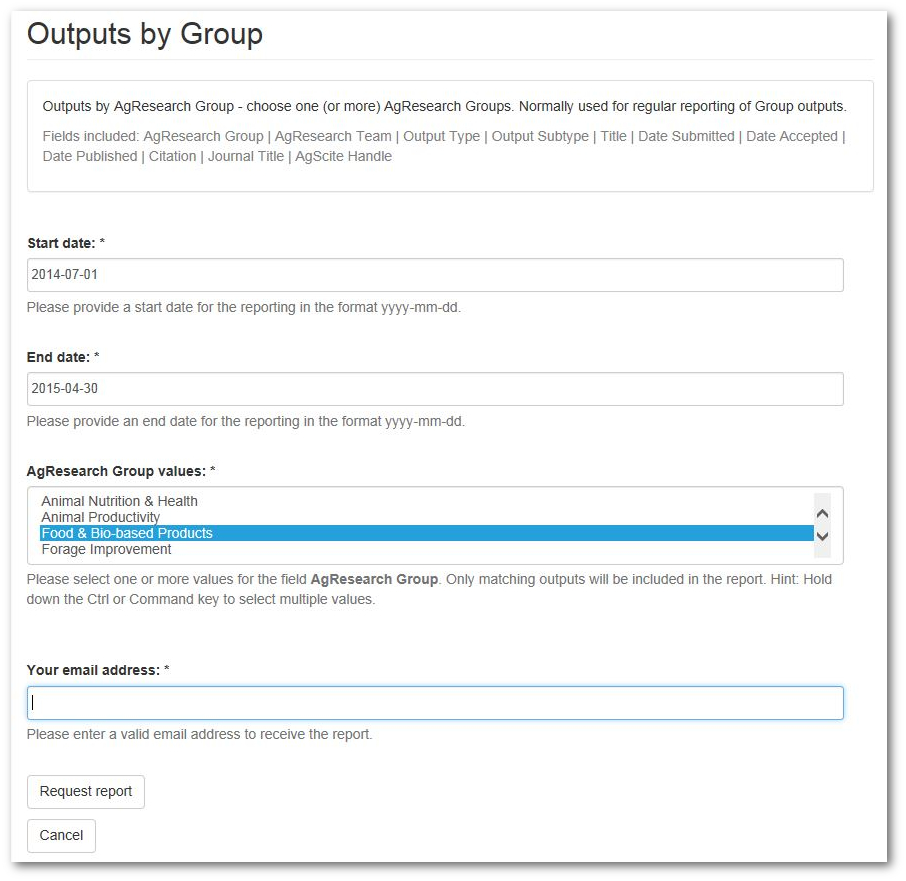
    On the report's settings page, you need to select a start and end date for the report and fill in the e-mail address where the CSV file should be sent.

    Some reports may have fields set up as "pick" fields, see the "AgResearch Group" field in the screenshot. In that case, the report settings screen will show you a list of all values that exist for this metadata field in your repository. For each "pick" field, you need to select one or more values. Only those items with matching metadata will be included in the CSV file.

    The "Request report" button will trigger generation of the report. If there were any problems (e.g.  missing required parameters, problems generating the report, problems e-mailing the CSV file), you will receive an error message. Otherwise you will receive a success message and the CSV file should be making its way to the recipient's inbox.

    The report settings screen

    Behind the scenes, the report generation code queries the Solr core for Discovery. The date range entered on the report settings screen is converted to a Solr query. The date field can be set on a per-report basis in the configuration file. Any "pick" values are also added to the query. The sort options for the report (sort field and sort order) are also set in the configuration file on a per-report basis..

    Solr is instructed to save the query results to a temporary file in CSV format. If any post-processors are set up for the report, these are run on the temporary CSV file. Currently, two post-processor implementations exist. One post-processor changes the date format from the one used by Solr, for example to something better compatible with MS Excel. The other post-processor re-writes the handle (stored in 123456789/1234 format in Discovery) to include the canonical handle prefix (e.g. http://hdl.handle.net/) as configured in the DSpace configuration.

    The post-processed file is then e-mailed as an attachment, using an e-mail template (see "Create e-mail template" below).

  3. How do I use it?

    To add the content reporting functionality to your DSpace repository, follow the steps below, then rebuild and restart DSpace.

    Pull in the code

    Follow the instructions for the XMLUI-Extras module.

    Enable the aspect

    Edit [dspace-src]/dspace/config/xmlui.xconf. In the "aspects" section, add the following lines (omit the comment if you prefer):

    <!-- UoW IRRs content reporting aspect from http://uow-irrs.github.io/API-Extras/ -->
    <aspect name="AgResearch Reporting Aspect" path="resource://aspects/Reports/" />

    It's up to you where in the aspects section you add this, but remember that sidebar entries are generally added in the order that the corresponding aspects are defined in. If you add the line to the very end of the aspects section, the reporting section will appear at the bottom of the sidebar.

    Configure available reports

    Create the directory [dspace-src]/dspace/config/modules/reporting. Into this directory, place a file with the name reports-configuration.xml. The API-Extras module contains a sample configuration file.

    Each "field" element will produce a column in the report CSV file. The order of the "field" elements in the configuration file determines the order of the columns. Note that the "header" attribute must not contain any whitespace. For each "field" element, the Discovery index must contain a corresponding field with the same name.

    Create e-mail template

    Create a file called uow_report_email in the e-mail templates directory, [dspace-src]/dspace/config/emails. The template takes three parameters: the name of the report, the start date and the end date. Example template:

    # Email sent with report data attached as CSV
    #
    # Parameters: {0} name of the canned report
    #             {1} start date
    #             {2} end date
    #
    # See org.dspace.core.Email for information on the format of this file.
    #
    Subject: DSpace - report data
    Attached is the report you requested from DSpace.
    
    Report title: {0}
    Report start date: {1}
    Report end date: {2}
    
    Regards,
    the IRR team

    Optionally: Create and pull in custom post-processors

    The content reporting module as developed for AgResearch comes with two post processors: one to change the date format (ReformatDates.java) and one to add the canonical handle prefix to the handle field, which is just stored in 123456789/123 form in Discovery (HandleToCanonicalForm.java). You can create additional post-processors.

    Create a class that implements the PostProcessor interface (PostProcessor.java). Refer to the JavaDoc in the interface declaration for expected functionality. Ensure the class is on the classpath for your XMLUI web application (eg by adding it to the "additions" module). Then pull in your custom class in reports-configuration.xml just like the two default post-processors.